Hello! DIY floor mat for office chair is becoming a common choice for every official and professional.
Welcome, and I am curious about some questions!
Do you want to make your office space more comfortable and cozy?
Do you want to protect your floors from scratches and dents caused by your office chair?
I will try to discuss how to create your DIY floor mat for an office chair using simple materials.
You will learn the benefits of having a DIY mat, and the steps to plan and construct your mat. And you will get the tips to maintain and clean your mat.
You will also see some inspiring examples of DIY mats that transform ordinary workspaces into cozy and comfortable environments.
Let’s Get Started to Know about DIY floor mats for office chairs.
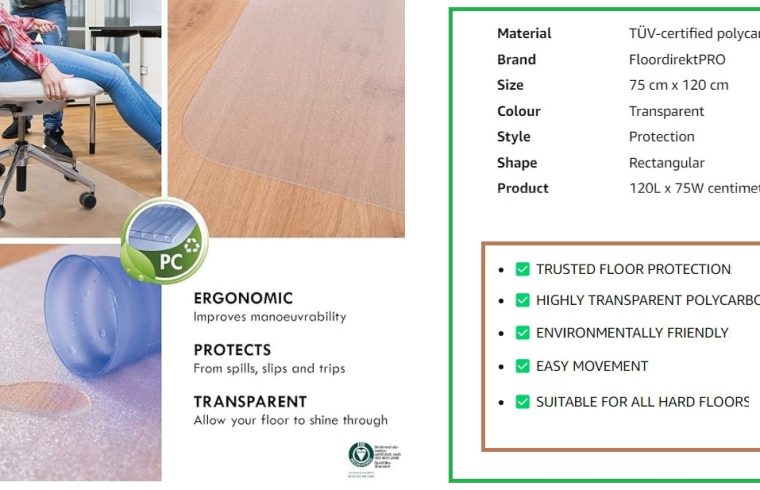
A DIY floor mat for an office chair is a homemade mat that you place under your office chair. That is basically used to protect your floor and create a comfortable workspace.
A DIY mat can be made from various materials, such as cardboard, fabric, vinyl, wood, or cork.
You can customize your mat to fit your workspace, match your style, and suit your needs.
Creating a comfortable workspace is important for your productivity, health, and well-being.
A comfortable workspace can help you focus, reduce stress, and improve your mood.
A DIY mat can contribute to your workspace comfort by providing cushioning, insulation, and noise reduction.
It can also prevent damage to your floor, which can save you money and hassle in the long run.
In this blog post, you will discover the benefits of having a DIY floor mat for an office chair. You will learn the materials and tools you need, and the steps to follow to create your mat.
You will also learn how to maintain and clean your mat, and how to add some extra features to enhance the mat.
Finally, you will see some success stories and inspirations from other DIY mat makers who have created their comfortable workspaces.
Understanding the Need for DIY Floor Mats for Office Chairs
Before you start making your DIY floor mat for an office chair, you need to understand why you need one.
The main reason is that your office chair can have a negative impact on your workspace comfort and your floor condition.
Your office chair can affect your workspace comfort in several ways. First, it can cause friction and noise when you move around on your floor.
This can be annoying and distracting, especially if you work in a quiet environment or share your space with others.
It can create uneven pressure and wear on your floor, which can cause discomfort and pain in your feet, legs, and back.
It can expose you to cold or hot temperatures on your floor, which can affect your body temperature and comfort level.
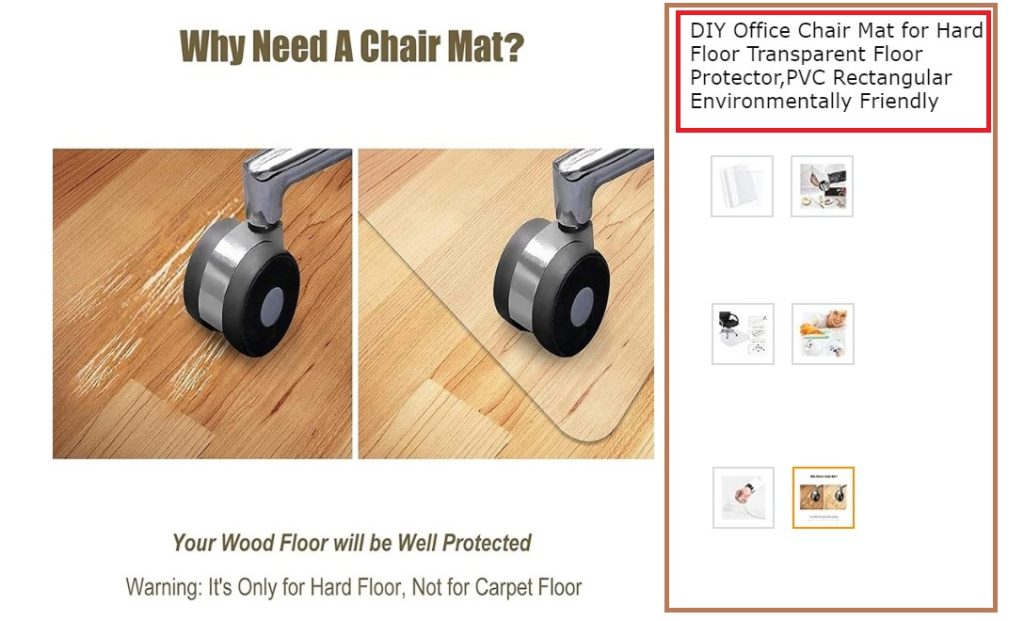
Your office chair can also damage your floor without proper protection.
Depending on the type of your floor and the material of your chair wheels, your office chair can cause scratches, dents, stains, or marks on your floor.
This can ruin the appearance and value of your floor, and require costly repairs or replacements.
Moreover, it can create safety hazards, such as tripping or slipping, if your floor becomes uneven or slippery.
To prevent these problems, you need to have a floor mat under your office chair.
However, buying a store-bought mat can be expensive, boring, or impractical.
Store-bought mats can cost a lot of money, especially if you need a large or custom-sized mat.
They can also be bland and generic, and not match your personal style or preference.
Furthermore, they can be hard to find, transport, or install, and may not fit your workspace or floor type.
That’s why making your own DIY floor mat for an office chair is a smart and creative solution.
A DIY mat can offer you many advantages over a store-bought mat, as you will see in the next section.
Advantages of DIY floor mat for office chair
Making your own DIY floor mat for an office chair can provide you with many benefits, such as cost savings, customization, and satisfaction.
Cost Savings
One of the main advantages of making your own DIY mat is that you can save a lot of money.
Compared to store-bought mats, DIY mats are much cheaper and more affordable.
You can use materials and tools that you already have at home, or buy them at low prices from local or online stores.
You can also reuse or recycle materials that would otherwise go to waste, such as cardboard boxes, old clothes, or vinyl flooring.
For example, you can make a DIY mat from cardboard for less than $10, while a store-bought mat can cost you more than $50.
You can also make a DIY mat from fabric for less than $20, while a store-bought mat can cost you more than $100.
You can see the comparison of the prices and sizes of different mat options in the table below.
| Mat Type | Material | Size | Price |
| Store-Bought | Plastic | 36 x 48 inches | $50 |
| Store-Bought | Fabric | 36 x 48 inches | $100 |
| DIY | Cardboard | 36 x 48 inches | $10 |
| DIY | Fabric | 36 x 48 inches | $20 |
As you can see, making your DIY mat can save you a lot of money, which you can use for other purposes or projects.
You can also make multiple mats for different workspaces or seasons, without breaking the bank.
Customization
Another advantage of making your DIY mat is that you can customize it to your liking.
You can tailor your mat to your workspace, your floor type, and your style.
Add some features or embellishments to your mat to make it more functional or attractive.
Customize your mat to your workspace by choosing the size and shape that fits your space and your chair.
Measure your workspace and cut your mat accordingly, or use a template or a pattern to guide you.
Choose the shape that suits your preference, such as rectangular, circular, or oval.
You can customize your mat to your floor type by choosing the material that works best for your floor.
What is important to this process
You can select the material that provides the right amount of cushioning, protection, and stability for your floor.
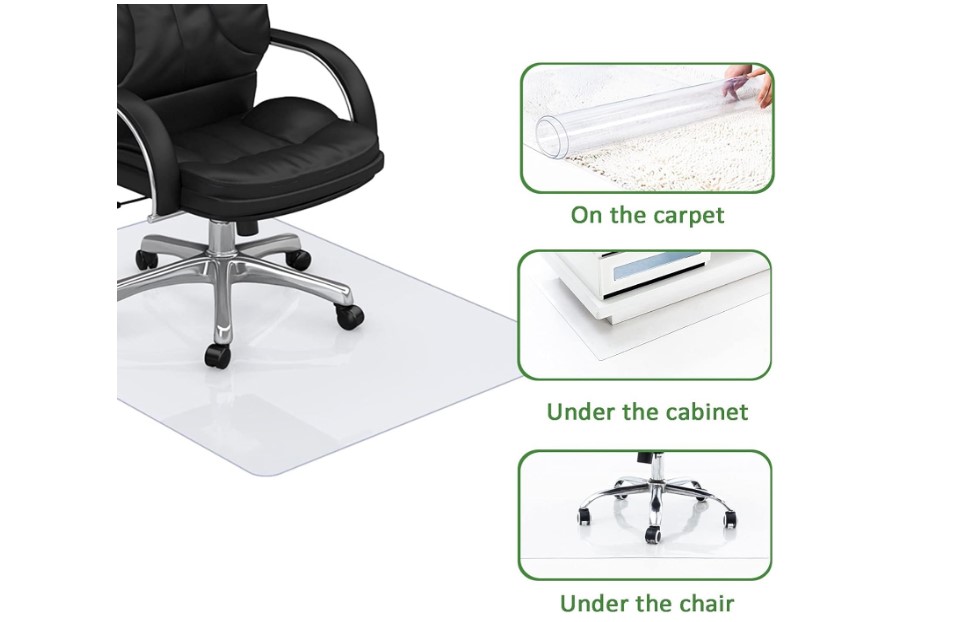
For example, you can use cardboard or wood for hard floors, such as tile, laminate, or hardwood. Use fabric or vinyl for soft floors, such as carpet, rug, or grass.
Customize your mat to your personal style by choosing the color, design, and texture that match your taste and your decor.
Use materials that have the color or pattern that you like, or paint or dye them to your desired hue.
You can also use materials that have the texture or feel that you enjoy, such as smooth, rough, or fuzzy.
Also, add some features or embellishments to your mat to make it more functional or attractive.
Adding some non-slip surfaces, thermal insulation, or noise reduction to your mat to enhance your comfort and safety.
Add some decorations, such as stickers, stamps, or ribbons to your mat to make it more fun and appealing.
By customizing your mat, you can create a unique and personalized mat that reflects your personality and your needs.
You can also express your creativity and have fun while making your mat.
Satisfaction
The final advantage of making your own DIY mat is that you can feel a sense of satisfaction and accomplishment.
You can take pride in your work and enjoy the fruits of your labor. You can also share your mat with others and inspire them to make their own mats.
Making your own DIY mat can be a rewarding and enjoyable experience.
Here is the next part of your blog post on DIY floor mats for office chairs, based on your outline:
Materials and Tools
To make your own DIY floor mat for an office chair, you will need some materials and tools.
The materials and tools you need may vary depending on the type of mat you want to make, but here are some common ones that you can use for most DIY mat projects.
Overview of Common DIY Mat Materials
The main material you need for your DIY mat is the base material, which is the material that will form the body of your mat.
The base material should be sturdy, durable, and flexible enough to withstand the weight and movement of your office chair.
It should also be easy to cut and shape to your desired size and form.
Some common base materials that you can use for your DIY mat are:
Cardboard
Cardboard is a cheap and readily available material that you can use for your DIY mat.
You can use cardboard boxes, sheets, or tubes that you have at home, or buy them from local or online stores.
Cardboard is easy to cut and shape and can provide a decent amount of cushioning and protection for your floor.
However, cardboard is not very durable or water-resistant and can wear out or warp over time.
You may need to reinforce your cardboard mat with some tape, glue, or other materials to make it stronger and more stable.
Fabric
Fabric is another inexpensive and accessible material that you can use for your DIY mat.
You can use fabric scraps, old clothes, or blankets that you have at home, or buy them from local or online stores.
Fabric is soft and flexible and can provide a cozy and comfortable feel for your floor.
However, the fabric is not very sturdy or resistant to stains and can tear or fray easily.
You may need to sew or glue your fabric mat together or use some backing material, such as vinyl, to make it more durable and stable.
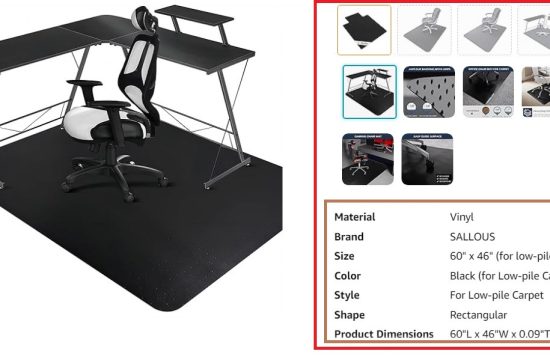
Vinyl
Vinyl is a synthetic material that is commonly used for flooring, upholstery, or tablecloths.
You can use vinyl sheets, tiles, or planks that you have at home, or buy them from local or online stores.
Vinyl is hard and smooth and can provide a good amount of protection and stability for your floor.
It is also water-resistant and easy to clean. However, vinyl is not very flexible or breathable and can be slippery or sticky depending on the temperature.
You may need to cut or score your vinyl mat to make it fit your space and your chair or use some adhesive or nails to secure it to your floor.
Wood
Wood is a natural material that is widely used for furniture, flooring, or crafts.
You can use wood boards, planks, or pallets that you have at home, or buy them from local or online stores.
Wood is strong and durable, and can provide a rustic and elegant look for your floor.
It is also resistant to scratches and dents and can be stained or painted to your desired color.
However, wood is not very flexible or water-resistant, and can warp or rot over time.
You may need to sand or polish your wood mat to make it smooth and safe or use some varnish or sealant to make it more waterproof and durable.
These are some of the common base materials that you can use for your DIY mat.
But you can also use other materials, such as cork, rubber, or foam, depending on your preference and availability.
You can also mix and match different materials to create a unique and customized mat for your office chair.
Essential Tools for DIY floor mat for office chair Construction
The tools you need for your DIY mat construction may vary depending on the type of mat you want to make, but here are some essential tools that you can use for most DIY mat projects:
Measuring tape
A measuring tape is a tool that you can use to measure your workspace and your mat.
You can use a measuring tape to determine the length, width, and height of your space and your mat, and to mark the cutting lines on your material.
You can use a standard or a metric measuring tape, depending on your preference and unit system.
Scissors or knife
A scissors or a knife is a tool that you can use to cut your material to your desired size and shape.
You can use scissors or a knife to cut through thin or soft materials, such as cardboard or fabric.
Saw or cutter
A saw or a cutter is a tool that you can use to cut through thick or hard materials, such as wood or vinyl.
Also recommended to use a saw or a cutter to cut your material to your desired size and shape and to create smooth and straight edges.
Use a power or a manual saw or cutter, depending on your material and your skill level.
You may also need to use some protective gear, such as gloves or goggles, and be careful not to injure yourself or damage your floor.
Glue or tape
A glue or tape is a tool that you can use to join or reinforce your material.
Use glue or tape to stick your material together or to attach some backing or finishing material to your mat.
Also use a sewing machine, a stapler, or a hammer to help you attach the backing or finishing material to your mat.
Get some scissors, a knife, or a saw to trim or cut the backing or finishing material to fit your mat.
Step-by-Step Construction
Now that you have planned your DIY floor mat for the office chair, you are ready to start making it.
You need to follow some steps to construct your mat, such as cutting and shaping the mat, applying finishing touches, and securing the mat in your workspace.
These steps will help you create a mat that is sturdy, durable, and functional.
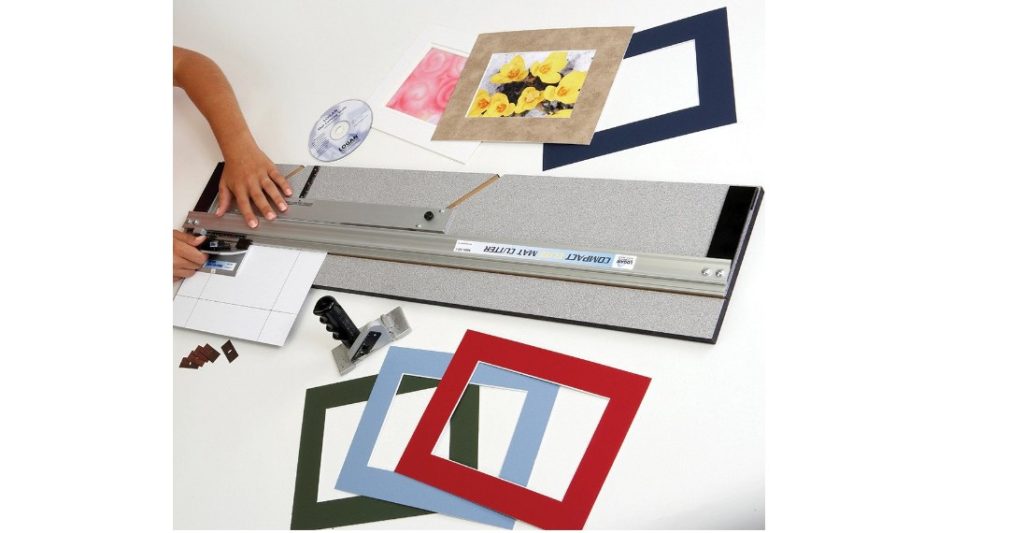
Cutting and Shaping the Mat
The first step to constructing your mat is to cut and shape your material to your desired size and form.
You need to use the tools that you have prepared, such as scissors, knife, saw, or cutter.
Follow the cutting lines that you have marked on your material, or use the template or the pattern that you have printed.
To cut and shape your mat, you can follow these steps:
Place Material
Place your material on a flat and stable surface, such as a table, a floor, or a cutting board.
Make sure you have enough space to work and move around, and protect your surface from scratches or stains with some newspaper, cardboard, or cloth.
Measuring Instruments
Use your measuring tape, pen, and paper to mark the cutting lines on your material, or use your template or pattern to trace the outline of your mat on your material.
You can use a ruler, a compass, or a protractor to help you draw straight or curved lines, or use some objects, such as plates, bowls, or cans, to help you draw circles or ovals.
Cutters
Use your scissors, knife saw, or cutter to cut along the cutting lines on your material, or use your template or pattern to guide you.
You can use a cutting mat, a ruler, or a clamp to help you cut smoothly and accurately.
You can also use some sandpaper, a file, or a nail to smooth out any rough or uneven edges.
Checking Size & Shape
Check the size and shape of your mat, and make sure it fits your workspace and your chair.
To do that use your measuring tape, your paper sketch, or your template or pattern to compare your mat with your space and your chair.
Place your mat on your floor test it with your chair, and see if it works well.
Trim or adjust your mat if needed, or start over if you are not satisfied.
Applying Finishing Touches
The second step to constructing your mat is to apply some finishing touches to your material.
You need to use some materials and tools that you have prepared, such as glue, tape, paint, or varnish, and add some backing or finishing material to your mat.
You can also add some decorations, such as stickers, stamps, or ribbons to your mat.
To apply finishing touches to your mat, you can follow these steps:
Choose the Best Material
Choose a backing or finishing material for your mat, depending on your base material and your floor type.
You can use a backing or finishing material to make your mat more durable, stable, and attractive.
For example, you can use vinyl, cork, or rubber as a backing material for your cardboard or fabric mat, to make it more water-resistant and slip-resistant.
You can also use fabric, paint, or varnish as a finishing material for your wood or vinyl mat, to make it more colorful and smooth.
Use Fitting Tools
Apply the backing or finishing material to your mat, using glue, tape, or nails.
Use glue or tape to stick the backing or finishing material to your mat or use nails to secure it to your mat.
Get the help of a sewing machine, a stapler, or a hammer to help you attach the backing or finishing material to your mat.
Use some scissors, a knife, or a saw to trim or cut the backing or finishing material to fit your mat.
Design Instruments
Add some decorations to your mat, using stickers, stamps, or ribbons.
Use stickers, stamps, or ribbons to personalize your mat and make it more fun and appealing.
There are also other usable items, such as buttons, beads, or feathers to decorate your mat.
Like glue, tape, or pins to attach the decorations to your mat, or use a needle, thread, or string to sew or tie them to your mat.
Securing the Mat in Your Workspace
The final step to constructing your mat is to secure it in your workspace.
You need to use some materials and tools that you have prepared, such as adhesive, nails, or velcro, and fix your mat to your floor.
You can also use some weights, such as books, or furniture, such as your desk, to hold your mat in place.
To secure your mat in your workspace, you can follow these steps:
Learn about Mat Material and Floor type
Choose a method to secure your mat to your floor, depending on your mat material and your floor type.
You can use a method that is easy, safe, and effective for your mat and your floor.
For example, you can use adhesive, nails, or velcro to secure your mat to hard floors, such as tile, laminate, or hardwood.
You can also use weights, such as books, or furniture, such as your desk, to secure your mat to soft floors, such as carpet, rug, or grass.
Use Adjustable Tools
Apply the method to secure your mat to your floor, using adhesive, nails, or velcro.
Some useful tools like adhesive, nails, or velcro to stick or fasten your mat to your floor or use weights, such as books, or furniture, such as your desk, to press or place your mat on your floor.
Use a hammer, a drill, or a screwdriver to help you secure your mat to your floor.
You can also use some scissors, a knife, or a saw to cut or adjust your mat if needed.
Check Chair Comfortability
Check the stability and mobility of your mat and your chair, and make sure they work well together.
Get your chair to test your mat and your floor and see if they are comfortable and safe.
Move your chair around and see if your mat and your floor are stable and smooth.
Adjust or change your mat or your floor if needed, or enjoy your new and improved workspace.
Benefits of a Comfortable Workspace
Now that you have made your DIY floor mat for an office chair, you can enjoy the benefits of having a comfortable workspace.
A comfortable workspace can help you increase your productivity, enhance your ergonomics and health, and improve your mood and well-being.
Increased Productivity
One of the benefits of having a comfortable workspace is that you can increase your productivity.
A comfortable workspace can help you focus, reduce stress, and improve your performance.
A DIY mat can contribute to your workspace comfort by providing cushioning, insulation, and noise reduction.
It can also prevent damage to your floor, which can save you money and hassle in the long run.
By having a comfortable workspace, you can work more efficiently and effectively, and achieve your goals and tasks.
You can also work more creatively and innovatively, and generate new ideas and solutions.
You can also work more collaboratively and cooperatively, and communicate better with your colleagues and clients.
Enhanced Ergonomics and Health
Another benefit of having a comfortable workspace is that you can enhance your ergonomics and health.
A comfortable workspace can help you maintain a good posture, prevent injuries, and promote wellness.
DIY mats can contribute to your workspace’s ergonomics and health by providing cushioning, protection, and stability. It can also prevent discomfort and pain in your feet, legs, and back.
By having a comfortable workspace, you can work more comfortably and safely, and avoid physical and mental fatigue.
You can also work more healthily and happily, and improve your quality of life.
You can also work more sustainably and eco-friendly, and reduce your environmental impact and your carbon footprint.
Positive Impact on Mood and Well-being
The final benefit of having a comfortable workspace is that you can improve your mood and well-being.
A comfortable workspace can help you boost your mood, increase your happiness, and enhance your well-being.
DIY mat can contribute to your workspace’s mood and well-being by providing a cozy and comfortable feel.
It can also reflect your personality and style, and make your workspace more fun and appealing.
By having a comfortable workspace, you can work more positively and optimistically, and overcome challenges and difficulties.
You can also work more confidently and proudly, and celebrate your achievements and successes.
You can also work more meaningfully and purposefully, and fulfill your potential and aspirations.
Additional Features for diy floor mat for office chair
If you want to make your DIY mat more functional or attractive, you can add some additional features to your mat.
You can add some non-slip surfaces, thermal insulation, or noise reduction to your mat to enhance your comfort and safety.
You can also add some decorations, such as stickers, stamps, or ribbons to your mat to make it more fun and appealing.
Non-Slip Surfaces
One of the additional features that you can add to your mat is non-slip surfaces.
Non-slip surfaces can help you prevent your mat and your chair from sliding or slipping on your floor, which can cause accidents or injuries.
Non-slip surfaces can also help you keep your mat and your chair in place, which can improve your stability and mobility.
Add non-slip surfaces to your mat by using some materials and tools that you have prepared, such as rubber, cork, or velcro.
You can also use some items that you have at home, such as shelf liners, carpet tape, or hot glue.
Apply the non-slip materials to the bottom or the edges of your mat, or to the wheels or the legs of your chair.
Thermal Insulation
Another additional feature that you can add to your mat is thermal insulation.
Thermal insulation can help you regulate the temperature of your floor and your chair, which can affect your body temperature and comfort level.
Thermal insulation can also help you save energy and money, by reducing the need for heating or cooling your workspace.
You can add thermal insulation to your mat by using some materials and tools that you have prepared, such as foam, cork, or fabric.
You can also use some items that you have at home, such as blankets, towels, or newspapers.
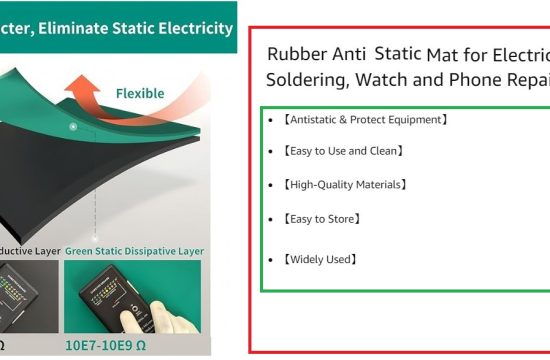
Noise Reduction
The final additional feature that you can add to your mat is noise reduction.
Noise reduction can help you reduce the noise and vibration that your mat and your chair make when you move around on your floor, which can be annoying and distracting.
Noise reduction can also help you create a quiet and peaceful workspace, which can improve your concentration and relaxation.
We recommend you add noise reduction to your mat by using some materials and tools that you have prepared, such as foam, cork, or fabric.
Also use some items that you have at home, such as egg cartons, cardboard tubes, or cotton balls.
You can apply the noise reduction materials to the bottom or the edges of your mat, or to the wheels or the legs of your chair.
To add noise reduction to your mat, you can follow these steps:
Noise Reduction Material
Choose a noise-reduction material for your mat, depending on your mat material and your floor type.
You can use a noise reduction material that is compatible with your mat material and your floor type, and that can provide the right amount of sound absorption and dampening for your mat and your chair. F
or example, you can use foam, cork, or fabric for any mat material and any floor type, as they are versatile and adaptable.
You can also use egg cartons, cardboard tubes, or cotton balls for cardboard or fabric mats, and for hard floors, such as tile, laminate, or hardwood.
Apply The Material
Apply the noise-reduction material to your mat, using glue, tape, or pins.
There are also glue, tape, or pins to stick or attach the noise-reduction material to the bottom or the edges of your mat, or to the wheels or the legs of your chair.
Use a sewing machine, a stapler, or a needle to help you attach the noise-reduction material to your mat or your chair.
Again use some scissors, a knife, or a saw to cut or adjust the noise-reduction material to fit your mat or your chair.
Examine The Result
Check the effectiveness and quality of your noise reduction, and make sure they work well with your mat and your chair.
You can use your chair to test your noise reduction and your floor and see if they are effective and quality.
Try to listen to the noise and vibration that your mat and your chair make, and see if they are reduced and improved.
Adjust or change your noise reduction if needed, or enjoy your new and improved mat and chair.
Maintenance and Cleaning Tips
After you have made your DIY floor mat for the office chair, you need to maintain and clean your mat regularly.
You need to use some materials and tools that you have prepared, such as cloth, brush, or vacuum.
Follow some easy cleaning strategies to keep your mat in good condition.
You can also use some materials and tools that you have at home, such as soap, water, or vinegar, to clean your mat more thoroughly.
Easy Cleaning Strategies
One of the maintenance and cleaning tips for your DIY mat is to follow some easy cleaning strategies.
Easy cleaning strategies can help you keep your mat clean and fresh, and prevent dirt, dust, or stains from accumulating on your mat.
Easy cleaning strategies can also help you save time and effort, and avoid damaging your mat or your floor.
You can follow these easy cleaning strategies for your DIY mat:
Vacuum Cleaner
Vacuum your mat regularly, using a vacuum cleaner or a handheld vacuum.
Try to Vacuum your mat once a week, or more often if your mat gets dirty or dusty.
Use a vacuum cleaner or a handheld vacuum to suck up the dirt, dust, or crumbs from your mat, and to fluff up your mat if it gets flat or dull.
Also, use a brush attachment or a nozzle attachment to reach the corners or the edges of your mat or to clean the wheels or the legs of your chair.
Cloth or Sponge
Wipe your mat occasionally, using a cloth or a sponge. Wipe your mat once a month, or more often if your mat gets stained or sticky.
Try cleaning it with a cloth or a sponge to wipe your mat with some water or some mild detergent, and to remove any spills, stains, or marks from your mat.
Use a cloth or a sponge to wipe the seat or the back of your chair and remove any dust, sweat, or oil from your chair.
Vibrate/Shake
Shake your mat occasionally, using your hands or a broom. Shake your mat once a month, or more often if your mat gets loose or messy.
Do not forget to use your hands or a broom to shake your mat outside or over a trash can and to remove any loose dirt, dust, or hair from your mat.
Use your hands or a broom to shake the backing or the finishing material of your mat and to remove any peeling, cracking, or shedding from your mat.
These are some of the easy cleaning strategies that you can follow for your DIY mat.
You can also use other methods, such as sweeping, dusting, or blotting, depending on your preference and availability.
You can also use some online tools, such as this one, to help you find the best cleaning method for your mat material and your floor type.
Longevity of DIY Mats with Proper Care
Another maintenance and cleaning tip for your DIY mat is to ensure the longevity of your mat with proper care.
Proper care can help you extend the life and the quality of your mat, and prevent your mat from wearing out or breaking down.
Proper care can also help you preserve the appearance and function of your mat, and keep your mat looking and working great.
You can ensure the longevity of your mat with proper care by following these tips:
Storing
Storing your mat properly, using a mat holder or a mat rack. Store your mat properly when you are not using it, or when you are moving or traveling.
You can use a mat holder or a mat rack to hang or roll your mat, and to keep your mat in shape and in place.
By using a mat holder or a mat rack to protect your mat from dust, moisture, or sunlight, and to prevent your mat from fading, wrinkling, or molding.
Repairing
Repair your mat promptly, using a needle or glue. Repair your mat promptly when you notice any damage or defect on the mat, such as tears, holes, or cracks.
Use a needle or glue to fix your mat and restore your mat to its original condition.
You can use a needle or glue to reinforce your mat and make your mat stronger and more stable.
Replacing
Replace your mat periodically, using a new or a different material.
Replace your mat periodically when your mat becomes old or worn out, or when you want to change or upgrade your mat.
A new or a different material to make a new mat and to enjoy a new and improved mat.
You can use a new or a different material to make a different mat and to try a different mat style or feature.
There are also other tips, such as washing, drying, or ironing, depending on your preference and availability.
You can also use some online tools, such as this one, to help you find the best care method for your mat material and your floor type.
Conclusion
You have reached the end of this blog post on DIY floor mats for office chairs.
We tried to learn how to create your own comfortable workspace by making a DIY mat for your office chair.
You have also learned how to plan, construct, and maintain your DIY mat, and how to add some additional features and decorations to your mat.
I hope this blog post has inspired you to create your own comfortable workspace by making a DIY mat for your office chair.
You can use the materials and tools that you have prepared, or use some items that you have at home, to make a unique and customized mat for your office chair.
Making a DIY mat for your office chair can be a fun and rewarding experience and a great way to improve your workspace’s comfort and quality.
Thank you for reading this blog post on DIY floor mats for office chairs.